Gmail (Email Relay)
- 1 Minute to read
- Contributors

- Print
- DarkLight
- PDF
Gmail (Email Relay)
- 1 Minute to read
- Contributors
- Print
- DarkLight
- PDF
Article Summary
Share feedback
Thanks for sharing your feedback!
About Connecting to Gmail for Sending Email
Campus Cafe is not an email provider. It leverages your existing email service to send emails from the system to recipients.
Campus Cafe uses one account to relay emails. Additional send from addresses may be configured using the Gmail Send Mail As feature.
The number of emails that can be sent per day and spam filtering are controlled by Google's terms and policies.
Configure Gmail
- Log in to the primary Gmail account
- In the upper right click the nine dots
- Click Account
- Click Security
- Ensure 2-step verification is enabled:
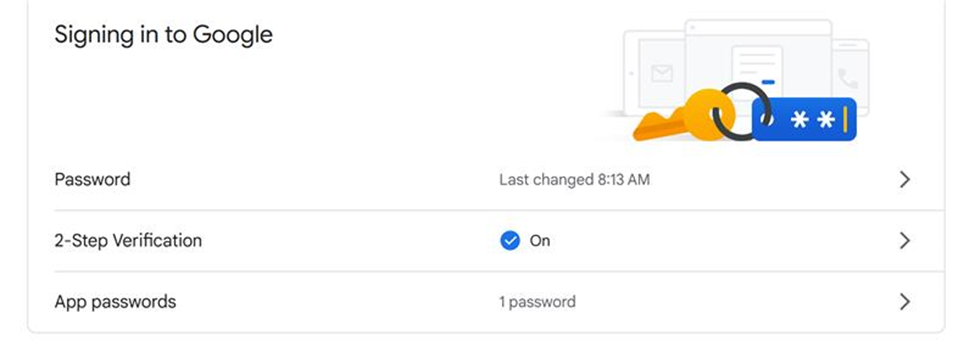
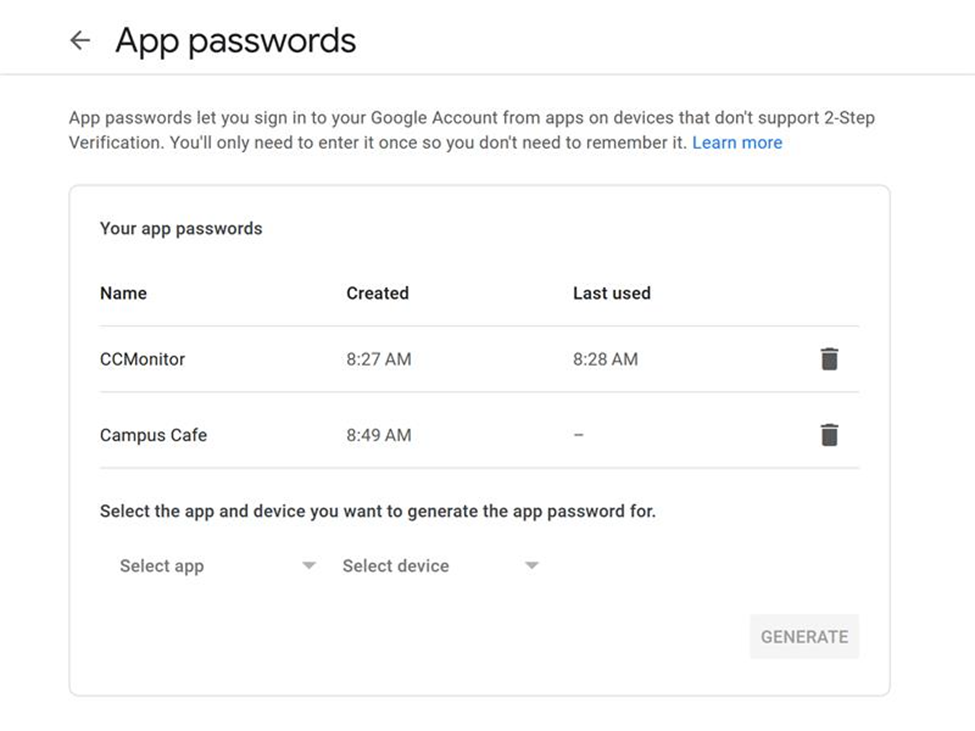
- Under App passwords, create an entry for Campus Cafe. Be sure to save this password for input into Campus Cafe:


Configure Campus Cafe
Campus Cafe requires one primary Gmail account to relay emails. Campus Cafe recommends this be a generic address such as info@yourschool.edu.
- Log in to Campus Cafe
- Navigate to Admin > Web App Config
- Locate the parameter SMTP_HOST and in the value enter smtp.gmail.com
- Locate the parameter SMTP_USER and in the value enter the full email address of the primary Gmail account
- Locate the parameter SMTP_PASSWORD and in the value enter the password of the primary Gmail account (This is the password created in step 6 of "Configure GMail" section above)
- Locate the parameter SMTP_PORT and in the value enter 587
- Locate the parameter SMTP_TLS and in the value enter Y
- Request Campus Cafe restart the server or wait overnight for an automatic restart
Specifying Additional Sender and Reply to Addresses
By default, emails sent from Campus Cafe will use the email set in Web App Config as the sender and reply to email.
Additional sender and reply to emails may be configured by leveraging Gmail's send mail as function.
- Log in to the Gmail account used in Campus Cafe Web App Config
- Click the gear icon in the upper right
- Click See all settings
- Click the Accounts tab
- In the "Send mail as" section, click Add another email address
- Enter the name and the address you want to send from
- Click Next Step and then Send verification.
- Sign in to the account you added
- Open the confirmation message you got from Gmail
- Click the link
- The Campus Cafe user associated with the email should set his or her Gmail address as his or her preferred email address (My Info > Email Address). A workflow can also be configured to send from a specific address by inputting the email address in the Send From box on the workflow.
Was this article helpful?